Michelle Stampe: Training for Jay P’s 200k Backyard Fat Pursuit Pt 1
Posted by Steve on 11/08/18
Last modified: 02/01/21
Training for JP’s 200k Backyard Fat Pursuit Part I
This is going to hurt. Why did I talk myself into this?
That’s how I feel at the start of pretty much every race I’ve ever done. I’ve only been racing and riding for two years, mind you, but I doubt that feeling will go away any time soon.
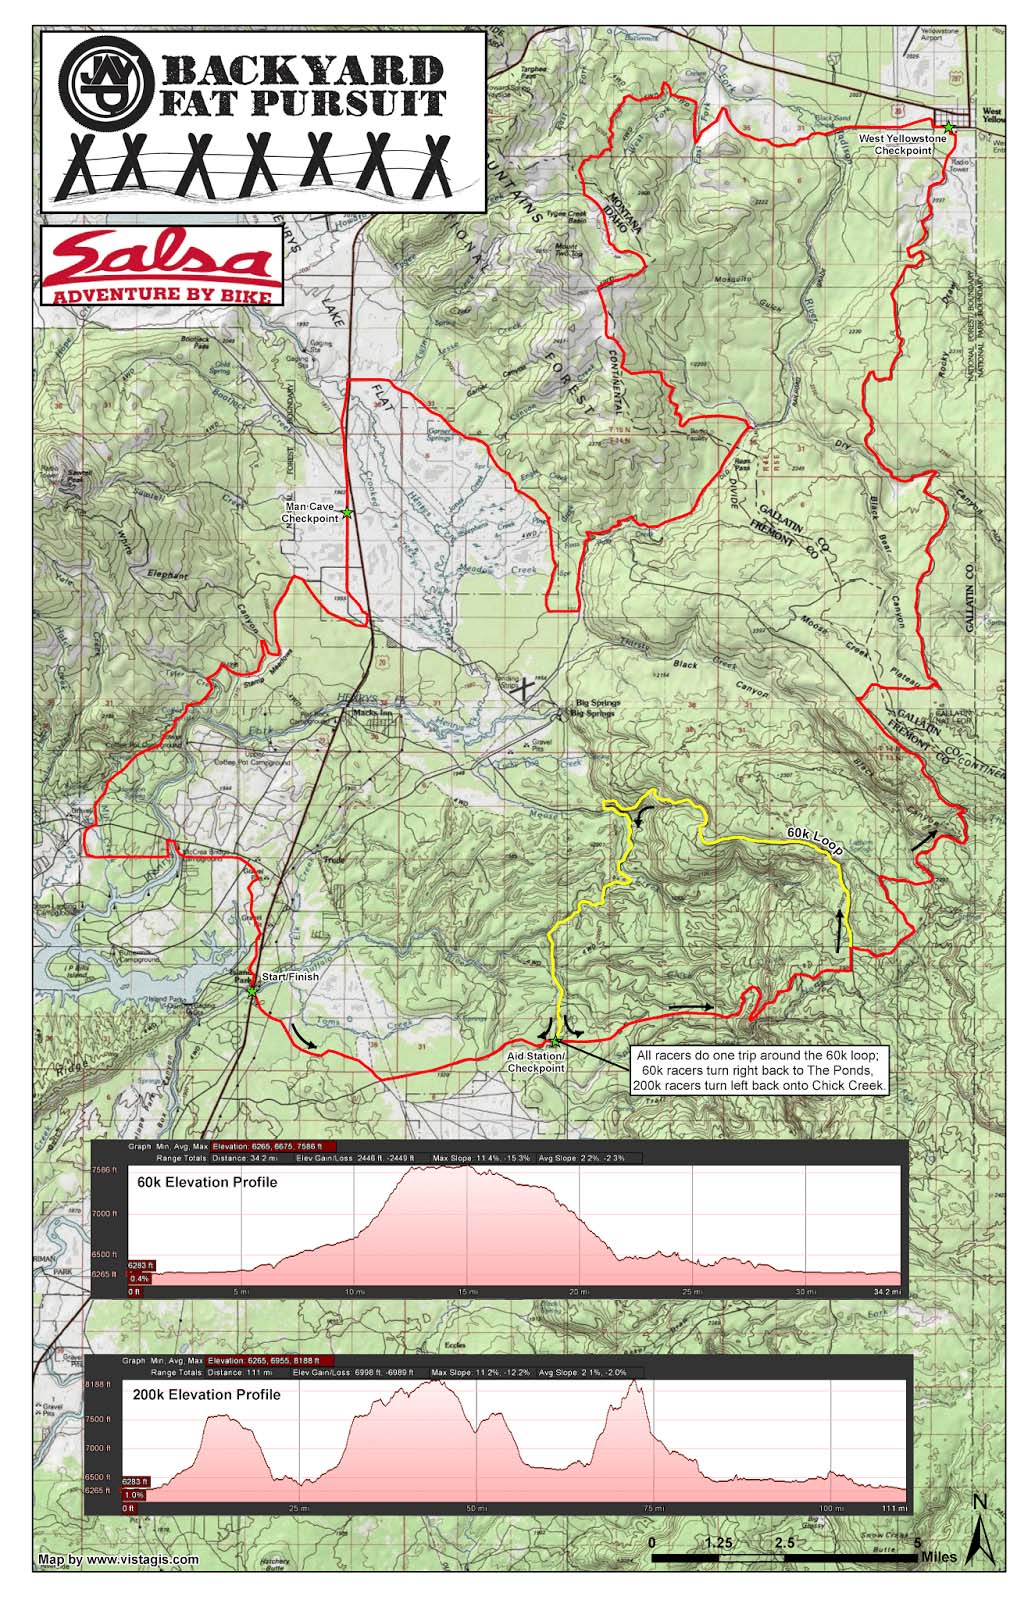
I’ know that’s how I’m going to feel fifteen weeks from now, on January 5th. I decided on my first ultra: JP’s Backyard 200k Fat Pursuit. I know I could have picked an “easier” first ultra. I probably should have.
Not only is The 200k Pursuit 124 miles with 6,000 feet of climbing, but it’s also located in west Yellowstone…and takes place in January. This race is so challenging in part because the trail could be dumped on with snow at any time, with zero warning. The extra snow on the groomed trail easily turns a 20-hour race into a multi-day suffer-fest. Paired with low temps and challenging terrain, you can see why most people end up throwing in the towel (race veterans have told me the success rate is around 50%). For those that are persistent and finish the course, they are rewarded with all that Yellowstone has to offer: incredible views, desolate terrain, and the kind of experience that pushes riders to go far beyond what they think they’re capable of.
I hear it’s one hell of a race.
1. START THINKING ABOUT YOUR TRAINING IN HOURS SPENT ON YOUR BIKE
Most people who spend a significant amount of time on their bikes pay attention to how many hours they’ve spent on a bike, as opposed to miles ridden or even elevation gained. I’m beginning to, as well. Especially for fatbiking.
Why?
Fatbiking is unique in that snow conditions dictate how strenuous a ride is. Sure, miles ridden and elevation gained matters too, but they both take the backseat to weather. A teensy, five-mile ride on flat terrain covered with six inches of power accumulating during a blizzard can be a lot more taxing on your body than a thirty-mile rollercoaster rip on a cold morning’s groomed hardpack. That’s why thinking about your training rides in terms of weekly hours spent on your bike vs. miles ridden can be a more accurate gauge of how hard you’re training, especially when it comes to winter riding.
My 15 week plan looks like a crescendo. My weekly hours start low, at about 7 hours a week, and slowly increases all the way up to 20 hours a week (including weeks of low intensity, as well). Then, three weeks before the Pursuit I’ll gently taper down to a modest amount of very low intensity cycling.
2. GENTLY RAMP UP YOUR HOURS
It can be really hard to not go overboard. Two months into my training plan I had a big week where I increased my weekly miles from a planned 11 hour week to 14.5. It was a huge mistake that has ended up costing me an entire week of training. My body just couldn’t recover, and I had to spend the next week gently pedaling, stretching and recovering. It was a huge hit, both physically and mentally.
3. TRAIN UP TO A RIDE BETWEEN 3/4 AND 2/3 THE DURATION OF THE PLANNED EVENT
Your final “big weekend” before race-day should be no more than three-fourths the estimated amount of time it will take you to finish the race. If you are feeling rushed to get ready for the event, consider making it closer to the two-thirds mark. Honestly, I found that even the two-thirds mark can be a little *too* much.
Let me explain. There are a few factors that make it difficult to calculate how big your final “big weekend” should be.
When you start researching a race you want you enter you’ll likely look at the average times for athletes finishing the event, and make your estimates based on those times.
It can be hard to estimate how many hours it will take you.
When it comes to fatbiking, I found that estimating how long a race might take is challenging (and frustrating!). If the trail is hardpacked and the skies are clear, your estimated finish time will be substantially faster than if a blizzard rolls through during the event.
For example, when I was researching the 200k Pursuit I noticed that top times varied dramatically from year to year. For example, in 2016 the top female time was 23 hours and 20 minutes, which comes out to averaging about 4.9 mph. The top male rider clocked in at 17 hours and 16 minutes, at about 6.6 mph. Last year (2018), conditions were much more challenging. Only one woman finished with a time of 30 hours and 48 minutes, averaging about 3.7 mph. A similar story can be seen for the men, with the top male coming in after 22 hours and 18 minutes at 5.2 mph. That is a HUGE difference!

Sometimes even 2/3 the event time can be too much.
At first I decided to train for the 25-hour goal, knowing I could come in before or after that time. That means that if I followed the two-thirds rule, my final big ride before the Pursuit would be around 16 hours. OUCH! That seems unreasonable to me—even potentially detrimental—so I dialed it down to 12 hours. I’ll re-evaluate when I get closer to race day, and may even opt for a 10 hour ride. The last thing I want to do is over train. With only fifteen weeks to prepare, putting my body through that big of a day three weeks before a race could jeopardize how I feel on race day. Remember, big efforts take around three weeks to fully recover from.
A big ask for me was to begin paying attention to my heart-rate zones. Wearing the silly rubber heart-rate monitor kills me! I guess we all have to sacrifice looking like an asshole for our sport sometimes. *sigh*
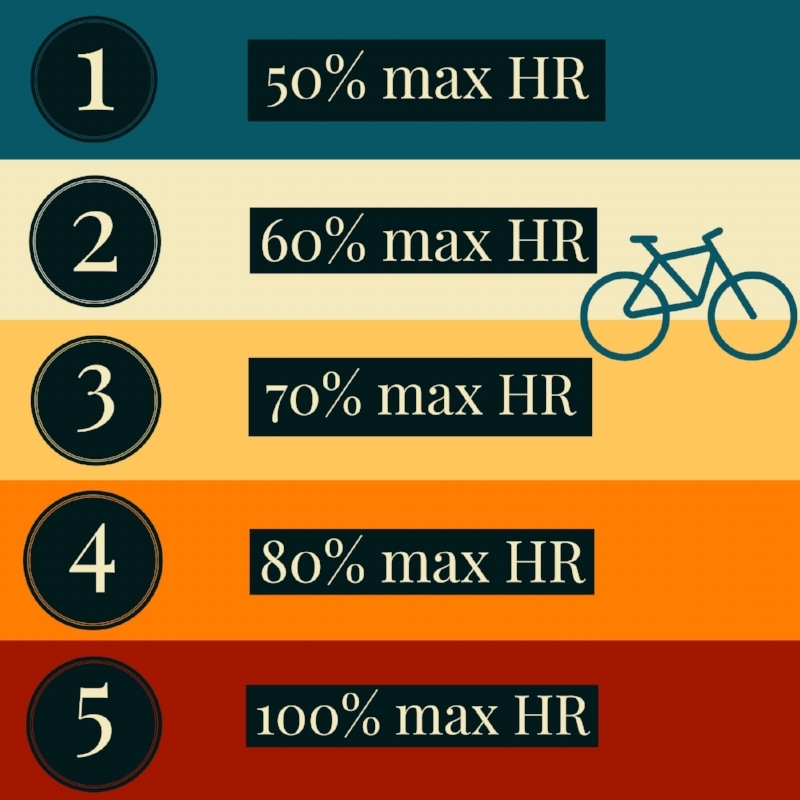
4. GET TO KNOW YOUR TRAINING ZONES
If you don’t want to use a heartrate monitor, here is a significantly less accurate way to gauge your zones:
Zone One (Recovery): I can talk (or focus on a podcast) the entire ride. I am careful to not push my legs to fatigue—if there is a steep hill coming up I get off my bike and walk. My muscles never burn. Usually these rides are on flat terrain and are meant to be fun! Invite your friend who doesn’t ride much to come along. They’ll love it when they out peddle you. Try to hop off a cool feature you always blow by or practice your wheelies…just not too hard!
Zone Three (Moderate): During a shorter race you’ll slow down to this pace every so often. You likely can’t hold a conversation, but you can talk a bit and are aware that you have a lot more to give. (Fun fact: Most people ride in this zone too often.)
Zone Four (Hard): You won’t be staying at this pace all day. You likely can’t maintain it for a long period of time, and may slip into Zone Three periodically. This is your stoked up race-pace. At this pace, you wish you could step off and catch your breath for a moment. The person riding beside you who is talking? Right now you kind of hate them.
Zone Five (Ouch): This feels like, “oh my god I can’t maintain this pace for more than five minutes!” Your muscles are burning, your heart is pounding, and you really want to stop. During HIIT days you’ll reach this zone periodically, for short bits of time. When I’m doing a HIIT workout at a hilly location, I’ll challenge myself to burst up every-other hill or so at max intensity, and then slow down to a moderate or light pace. I let the terrain dictate when and for how long I am challenged—it keeps me on my toes!
5. VARY YOUR RIDES
I’ve been experimenting with four different kinds of rides:
Fast and Hard
These rides have a ten minute warm up and cool down, and about an hour at an all-out sprint. I ride with Strava, and during these rides I challenge myself to set a PR. I do these once a week. These rides typically stay in zone 3-5.
Lactate Threshold Rides
These rides look like a HIIT ride, but with longer efforts. I do three sets of 15 minutes as hard as I can (above Lactate Threshold) paired with 10 minutes of recovery. These rides are scheduled 1-2 days a week, depending on how fatigued my legs are. These rides recover in zone 2 and ramp up to zone 4-5. Try to avoid zone 3.
Long and Slow
In the beginning, I only included one of these rides a week. As my training progressed, I started putting them back-to-back (Saturday and Sunday). These rides pair well with an over-nighter, which will also help you familiarize yourself with your gear. These are in zones 1-2, and occasionally 3.
Recovery
Active recovery has been shown to speed up recovery time in endurance athletes. I use these rides after a hard day in the saddle When I hit the verge of overtraining, I knew I was at that point because the only rides I could manage were recovery rides in zone 1&2.
If you continue to ramp up your big weekend rides every weekend for fifteen weeks, eventually you’ll reach a point where you won’t be able to recover in time for the next big ride. After a month or so of ramping up, opt for a significantly shorter ride every other week. Listen to your body! Some weeks you might call off the big ride and just recover.
6. SEE-SAW YOUR BIG RIDES
If you continue to ramp up your big weekend rides every weekend for fifteen weeks, eventually you’ll reach a point where you won’t be able to recover in time for the next big ride. After a month or so of ramping up, opt for a significantly shorter ride every other week. Listen to your body! Some weeks you might call off the big ride and just recover.
7. TRAIN IN CONDITIONS SIMILAR TO RACE DAY
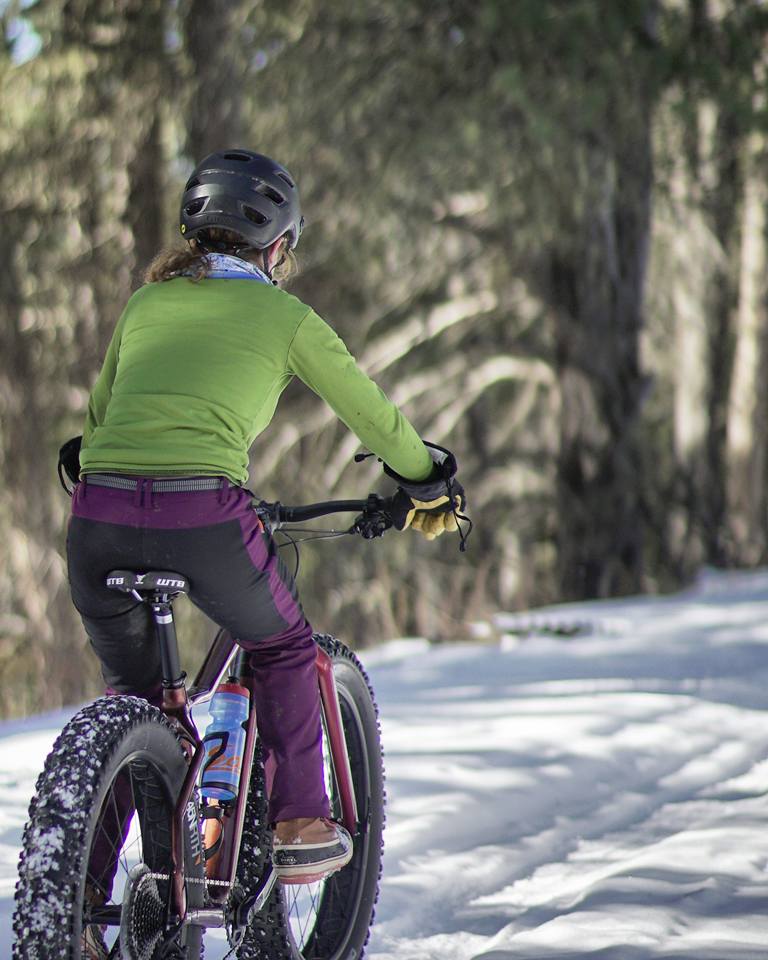
My friends always encourage me to train on the bike I’ll use on race day and in the conditions I expect to encounter. Last year my friend Molly was out riding her fatbike every day, in every condition. When race day came around she whoped women and men who’ve been riding decades longer than she has. They were stronger and more experienced. However, she knew how to ride her bike—what tire pressure to set for race day conditions, what jersey to wear to keep from sweating, and whether or not to bring pogies. While other riders pulled off to the side to let air out of their tires or take off their puffies she blew past them.
Try to recreate race-day situations. For example, to get ready for the extreme weather conditions of the Pursuit, I’ll be training at night and in the morning to catch those super chilly days at their chilliest (and darkest)! I want to know just how cold my insulated bottles can get before freezing and how cold temps affect my Garmin. I’ll also spend a few nights camping in the snow. I want to know how to most efficiently get into my sleeping bag and arrange my gear so that when I’m cold and exhausted on race day, I don’t have to put any mental effort into bedding down.
8. INCORPORATE CROSS TRAINING
I know I’m going to be pushing my fatbike through the snow for a very, very long time during this race. That means I have to be really, really strong. For me, going to the gym isn’t a realistic option—I want to spend my free time on my bike or pursuing other meaningful goals (like drinking wine on the couch with my dogs). Knowing this about myself, I had to create a workout routine that worked for me. It had to be quick (timewise), painless, and at my own home. I work my core and upper body for 15 short minutes 3 times a week and stretch after. Honestly, just 5 minutes a day and you will see results. However, if you only plan on working out 5 minutes a day, you might want to start 6 months in advance.
If you’re like me and hate this part of training, I can’t stress enough how important it is to be consistent. What I mean is that you will end up being stronger if you do a measly five pull ups and push ups every other day for fifteen weeks as opposed to working out really hard for an hour three times the first week, then once a week, then every other, and then not at all. Some days just getting on the floor and doing a few sit-ups is all you can stomach—I get it. Just make sure you do at least that.
Because this is my first ultra and my first time training, I sent my schedule to a few knowledgeable friends for their opinion. Of course, I received mixed reviews. One friend thought it was about right, while another thought my weekly hours increased by way too much, and should increase by 30-45 minute increments. Therefore, I decided to document my perceived level of fatigue after each ride. That way, if I fail to recover by the end of the week on the weeks labeled “compensating for fatigue,” I know that I am likely overtraining and need to dial it back.
Countless studies have shown the importance of staying hydrated before, during, and after exercise. I think the biggest challenge in general is to drink water off the bike. Try filling up two Nalgenes daily and finish them.
9. DOCUMENT FATIGUE
I know I’m going to be pushing my fatbike through the snow for a very, very long time during this race. That means I have to be really, really strong. For me, going to the gym isn’t a realistic option—I want to spend my free time on my bike or pursuing other meaningful goals (like drinking wine on the couch with my dogs). Knowing this about myself, I had to create a workout routine that worked for me. It had to be quick (timewise), painless, and at my own home. I work my core and upper body for 15 short minutes 3 times a week and stretch after. Honestly, just 5 minutes a day and you will see results. However, if you only plan on working out 5 minutes a day, you might want to start 6 months in advance.
10. STAY HYDRATED
I recommend filling at least one of those bottles one with electrolytes. Sports drinks that include electrolytes like sodium, potassium and magnesium have been proven to speed up intestinal re-absorption of fluids and improve fluid retention. You can use Fizz tabs, sports drinks like EndurElite (which include carbohydrates and protein, as well), or even good ol’ Gatorade for the budget-minded.
You may be thinking, “that’s all well and good, but how am I supposed to drink water when it’s 10 degrees F outside without it freezing?”
A trick I use is to place my bottles upside down in my water cages. It should give you an extra 10 minutes to an hour to drink your water, depending on the temp. When it’s really cold, it might be time to invest in some insulated bottles. Polar Bottle makes an inexpensive, double walled bottle, as well as a burlier, stainless steel, vacuum sealed bottle for those super cold days. The Yeti Rambler or HydroFlask is another great choice, however I have yet to find a stainless steel model without a metal drinking piece (when temps dip below zero, those metal pieces can get cold). I like to pour hot water straight out of the kettle into mine.
11. EAT, EAT, AND THEN EAT SOME MORE
I’m serious!
Burgers, curry, red wine?! Yes please!
You’re going to love this part. Since I started training, the relationship I have with my body and the food I eat has completely transformed. Before I started training in earnest, maintaining my weight was always a delicate balance between what I wanted to eat and what I should eat. Once I began tipping the ten-hour-a-week point on my bike, suddenly I couldn’t eat enough. I’ve never been a calorie counter, but if I had to guess I’d say I’ve increased my daily calorie intake by 700-1000 calories a day. During my weekend big efforts, bump that up to 2000. I’m constantly (gladly) snacking just to get enough fuel in my body to be ready to wake up tomorrow and do it all over again.
Hellooooooooooo Heavy Whip in my coffee—it’s been too long.
I recently listened to an episode of The Joe Rogan Experience where he interviews ultra-endurance athlete, Courtney Dauwalter. She’s basically the Mia Hamm—Billie Jean King—Gertrude Ederle—Jenny Thompson of the ultra endurance running world, winning the Moab 240 outright and setting the record at 57 hours and 55 minutes, and beating the second place dude by over 10 hours. When Joe Rogan asked her what kind of super diet she followed to achieve her superwoman-esque feat, she replied, ‘beer, nachos, and a multivitamin.’ (!!!)
I never really understood this response until I started training (albeit for a smaller event). How could a top athlete—arguably the single greatest ultra-endurance runner, like, ever—fuel up with nachos?
While vitamins and whole grains and fruits and veggies are super important to overall health, ultra endurance athletes need to stock up on high GI (glycemic index) carbs, as well. Those delicious, doughy, filling, no-longer-guilty, carbs.
The main reason to consume carbs post-ride is to replenish the muscle glycogen stores that your body used during the sweat-fest. Glycogen is basically just the form your body puts glucose in for safe keeping, until it breaks it down for ATP during your next ride.
The best time to refuel with carbs is right after a ride. Actually, within 30 minutes, to be exact, and no longer than 4 hours later.
*There has been a recent study that shows athletes on a low carb diet burn fat more efficiently than those on a high carb diet, which proves that we can’t agree on pretty much anything.
Because all of our goals, bodies, and schedules are so different, I encourage you to write some flexibility into your training schedule. Allow yourself the freedom to switch days around, recover, and actually live life while training.
Good luck on your first ultra!
-Michelle Stampe ShredWorthy